In my IT business, I deal with a LOT of files from various machines – both Windows and Mac. For example, when a customer has drops off a computer or hard drive for repair, backing up the data is one of the first tasks. I simply cannot afford to lose my customers’ data.
 Now, while I make my living working primarily on Windows issues, I run a Macbook Pro. Why? That’s simple. It just runs – with very few issues.
However, that can present some challenges since my backup drives are formatted OSX Extended Journaled. Sometimes, when copying folders and files from an NTFS partition/drive the “locked” attribute is retained. Yes, I do run Tuxera so I can easily read/write to NTFS drives, but there is a performance hit versus running OSX formatting. The problem arises when I later want to “clean up” those backup drives and get rid of my old customer files after I have completed a repair and no longer to retain the data.
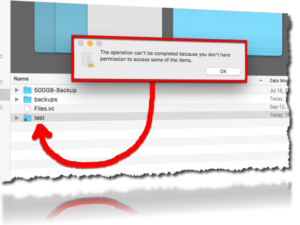
To make matters more interesting, one of the bigger challenges is when the hidden folders retain the locked attribute in subfolders. That can result in the veritable “whack a mole” trying figure out why I can’t simply delete a folder. Yeah – I could format the drive, but on some drives I may already have 100’s of GBs of data that I don’t need wiped out.
The solution is actually pretty simple.
(1) Show hidden files in Finder.
- Open Terminal found in Finder > Applications > Utilities.
- In Terminal, paste the following: defaults write com.apple.finder AppleShowAllFiles YES.
- Press return.
- Hold the ‘Option/alt’ key, then right click on the Finder icon in the dock and click Relaunch.
(2) Unlock all the files and folders in bulk.
- Open the Terminal in the /Applications/Utilities/ folder or by using Spotlight and typing in “Terminal” (no quotes)
- In Terminal type in the following: chflags -R nouchg
- Then drag the external hard disk (or just the top folder) into the Terminal window and press Enter
- If you suspect there may be files or folders owned by another account – then do the same steps with the following command (providing your password when prompted): sudo chflags -R nouchg
(3) Delete the files and folders!